

Opening Words
Walking into a newly renovated home always brings joy with its fresh feeling. According to data from a home renovation platform, 90% of homeowners start experiencing various issues just three years after renovation. However, with proper maintenance methods, your home can maintain its renovated appearance for over ten years. As someone who has gone through two renovations, I want to share all the lessons learned and experience gained over these years. From material selection to daily maintenance, from waterproofing to mold prevention, every detail affects our living quality.
Floor Rescue
I remember when the floors were so shiny right after renovation that you could see your reflection. The first thing I did every day when coming home was changing into slippers, afraid of leaving scratches on the floor. But no matter how careful we were, scratches and dents were inevitable after some use. Seeing marks on the expensive solid wood flooring broke my heart, and I almost wanted to replace it.
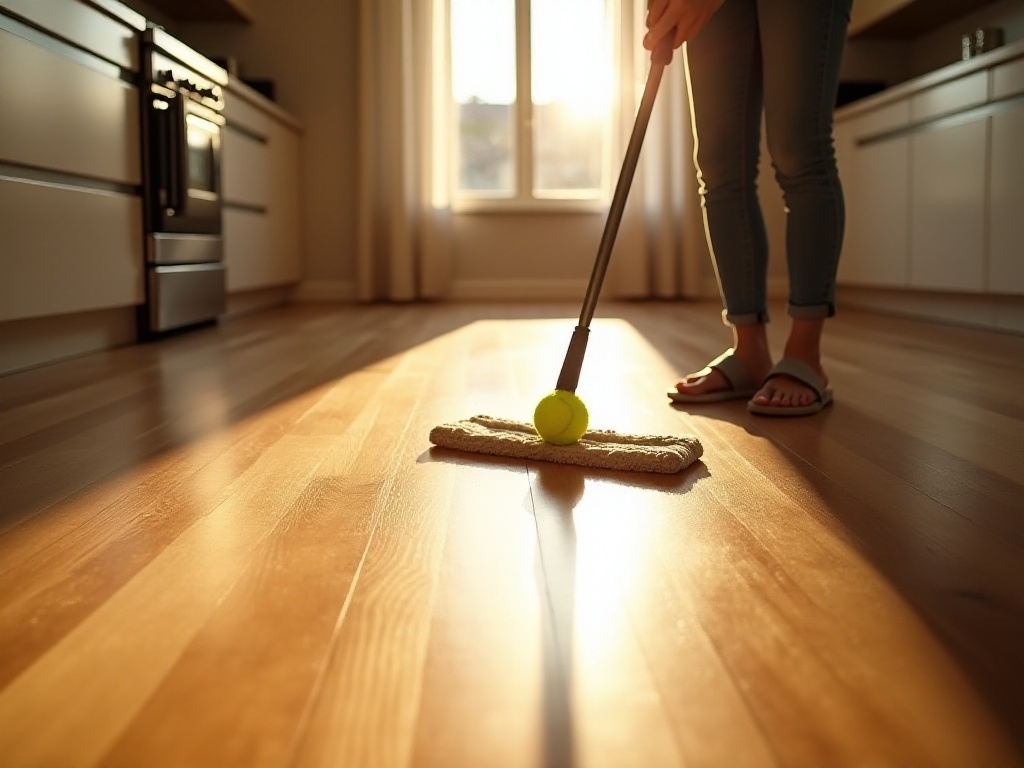
Later, through research and practice, I discovered some particularly effective methods. The most surprising was the tennis ball cleaning method. By attaching a tennis ball to the end of a mop handle, you can easily remove scratches from the floor. The tennis ball's fuzzy texture is soft enough to gently remove scratches without damaging the floor surface. I found this trick so amazing - instead of kneeling and scrubbing hard like before, I could now do it while standing, saving my back from pain.
Speaking of floor maintenance, I want to share another excellent trick for handling dents in wooden floors. Once I accidentally dropped a vase on the floor, leaving an unsightly dent. Just when I was worried, I discovered it could be fixed with an iron. How? First, wet the dented area, cover it with a damp towel, then use an iron on medium heat to gently press the spot. The wood fibers will gradually expand with heat and return to their original state. I couldn't believe my eyes the first time I tried it - that deep dent actually disappeared.
However, when using the iron method, pay special attention to temperature control. Too high will damage the floor surface, while too low won't be effective. It's recommended to test in an inconspicuous corner first to find the right temperature. Also, control the ironing time - usually 15-20 seconds is enough, as too long can cause floor deformation.
For daily floor maintenance, I've summarized several practical tips. First is controlling indoor humidity, which is particularly important. I placed dehumidifiers in both the living room and bathroom, maintaining relative humidity between 45%-65%. This prevents both floor cracking and mold formation.
Second is protection. Put protective pads under furniture feet to effectively prevent floor scratches. I also placed an absorbent mat at the door to wipe off shoe moisture on rainy days, preventing water damage to the floor.
Lastly, regarding cleaning, many people like to use a wet mop directly, which is actually very damaging to the floor. The correct method is to first vacuum up dust, then wipe with a clean soft cloth dampened with professional floor cleaner. After cleaning, it's best to wipe again with a dry towel to absorb any remaining moisture.
Carpet Tricks
Regarding carpets, many think they're difficult to maintain, but with the right techniques, maintenance isn't hard at all. Carpets not only make homes cozier but also effectively soundproof, making them essential soft furnishings for many households.
Let's start with the most common problem: dents from furniture. Once my carpet had several unsightly dents from sofa legs, and I almost gave up trying to fix them. Then I discovered the "ice cube method": place ice cubes on the dented areas and let them melt naturally. As the ice melts, the carpet fibers absorb the moisture and expand, eventually making the dents disappear. I've recommended this method to many friends, and they all say it works exceptionally well.
However, when using the ice cube method, it's best to wrap the ice cubes in plastic bags to prevent water from directly seeping into the carpet and causing odors. Also, use a hair dryer to dry the area afterward to prevent mold growth at the carpet base.
For fuzzing carpet issues, I suggest not rushing to cut them with scissors. First trim the fuzz shorter, then apply carpet-specific glue, cover with wax paper, and place a heavy book on top. Once the glue dries, the carpet will return to its smooth state. Though this method takes more effort, it works particularly well and solves the problem fundamentally.
For daily cleaning, many find carpets particularly challenging to maintain. But with the right methods, maintenance isn't difficult. First, use a vacuum cleaner regularly, at least twice a week. Make sure to vacuum multiple times, especially in high-traffic areas.
If the carpet gets stained, deal with it immediately. Different stains require different treatments. For coffee stains, use a mixture of clean water and white vinegar; for oil stains, sprinkle corn starch, let it absorb the oil, then vacuum it up.
Every three months or so, give your carpet a deep clean. Use professional carpet cleaner following the instructions carefully. Make sure the carpet is completely dry afterward to prevent mold and odors.
I've also discovered a particularly useful tip: place a non-slip pad under the carpet. This not only prevents the carpet from shifting but also extends its lifespan. The non-slip pad absorbs some pressure, reducing wear on carpet fibers.
Wall Renewal
Walls constitute the largest visual area in a home, and proper maintenance can make the entire house look fresh. Regarding wall repairs, I recently discovered a money-saving trick. Previously, we had to pay professionals to fix wall cracks, but now we can handle it ourselves.
The most practical solution is homemade wall putty: mix baking soda and white glue in a 1:1 ratio to create a simple wall filler. This formula not only works well but is also very cost-effective, costing only one-tenth of ready-made wall putty. To use it, first sand the area around the crack smooth, then use a scraper to fill the crack with the putty, let it dry, sand again, and finally paint over with matching latex paint.
For yellowing wall sections, I found hydrogen peroxide particularly effective. Dilute hydrogen peroxide with water, gently wipe the yellowed areas with a cotton cloth, and usually two or three applications will restore the original color. Just remember to ensure good ventilation to avoid inhaling too many fumes.
For corner and angle treatments, I find using masking tape for caulking most practical. I used to get caulk everywhere, but then I learned to first tape the edges that need caulking, apply the caulk, and remove the tape when it's half-dry for perfect results. This saves time and worry about messing up other areas.
Regarding wall maintenance, I believe prevention is more important than repair. Regular humidity control is essential to prevent wall moisture. If you notice signs of moisture return, address it promptly with a dehumidifier. Also, recommend doing a thorough wall inspection annually and addressing issues promptly to greatly extend wall life.
I especially want to remind everyone about range hood cleaning. Kitchen walls are most susceptible to yellowing from cooking fumes, so develop a habit of regular range hood cleaning. Recommend wiping it down weekly with professional cleaner to maintain clean walls and extend the range hood's life.

Bathroom Solutions
The bathroom is the area most prone to problems, but with correct maintenance methods, it can stay like new long-term. First, let's address the most troublesome tile issues. Many people's tiles turn yellow or black over time, especially in the grout lines. Actually, baking soda can easily solve this: make a paste with baking soda, apply it to the grout lines, let it sit for ten minutes, scrub with a toothbrush, then rinse clean.
Toilet scale is also common. I found cola works well for removing scale - pour it into the toilet and let it sit for half an hour, and the acidic components will dissolve the scale. However, note this method shouldn't be used frequently as the acid might damage the drainage pipes.
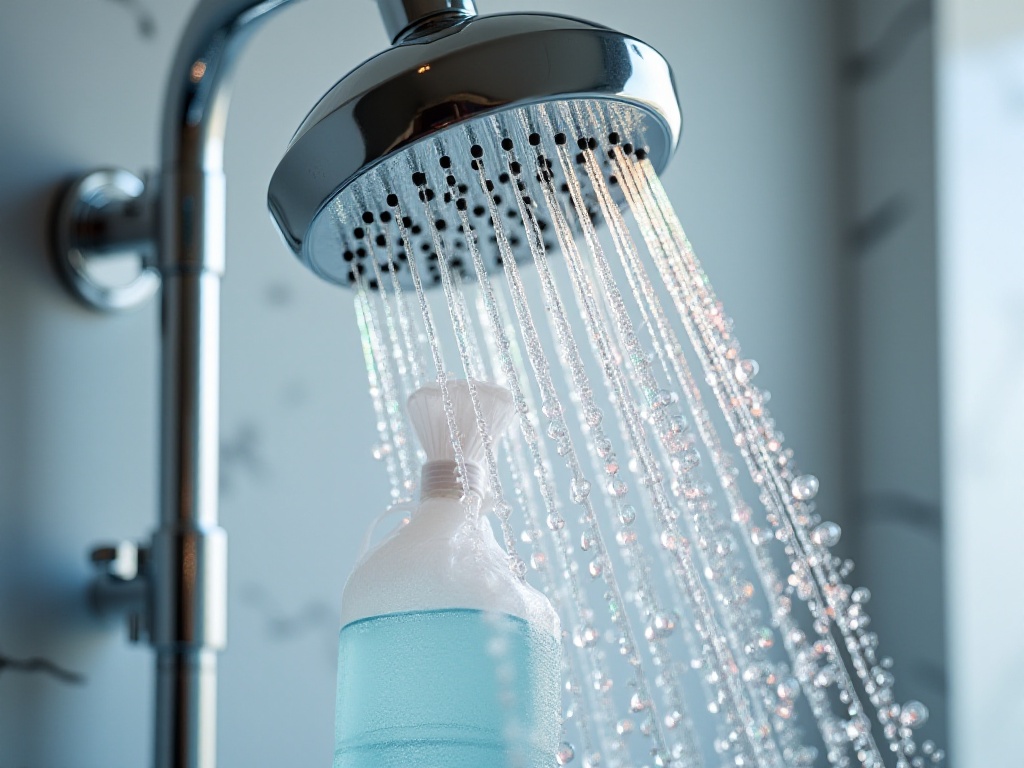
Shower glass easily accumulates scale and looks dirty. I recommend using a squeegee after each shower to remove water droplets, then wipe with a dry towel. Though more troublesome, this effectively prevents scale formation. If scale has already formed, mix white vinegar and water in a 1:1 ratio, spray on the glass, let sit for 15 minutes before wiping - works very well.
Faucets also need regular maintenance. If water flow decreases, it's likely scale buildup in the aerator. Remove the aerator, soak in white vinegar for half an hour, then gently scrub with a toothbrush to restore normal flow.
For drain maintenance, I recommend pouring hot water weekly to dissolve grease and dirt in pipes. Also, always use drain strainers to prevent hair and debris from clogging drains. If drainage slows, use a mixture of baking soda and vinegar to clear it - works better than chemical cleaners and doesn't harm pipes.
Finally, about mold prevention. Bathrooms are most prone to mold growth, especially in corners and crevices. The key to prevention is ventilation and dryness. We installed an exhaust fan and run it for half an hour after each shower for quick drying. If you find mold spots, spray diluted bleach, wait ten minutes, then wipe clean. Ensure good ventilation to avoid inhaling bleach fumes.
Years of renovation experience have taught me that consistency is key in home maintenance. Many problems that seem difficult can actually be solved yourself with the right methods and some patience. I hope these shared experiences help everyone maintain their homes better, keeping them looking fresh always.